How to create 3D animation of art pieces or antiques on transparent background?
Supply
Tool
Duration
-
1. Place and center

Clean any dust or debris from your art or antique item before placing in the studio.
Then, on the software, select the 3D button and choose hemispherical plus AutoMask as the shooting modes.
Now, use the centering marks on the studio and positioning rulers on the software to correctly place and center your item. Use the LiveView and make sure it is well centered from all 5 cameras. To verify, select each camera individually under camera settings. Then, manipulate your product or manually adjust the cameras’ position and zoom if needed.
When your art or antique item is correct centered from all cameras, click on the camera lock toggle.
-
2. Camera and light adjustments
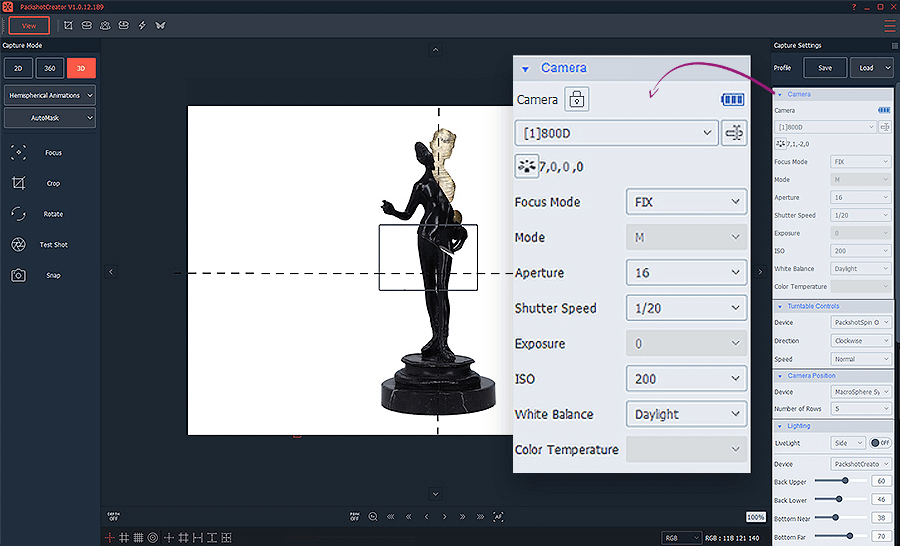
Now that the cameras are locked, any setting you choose will be applied to all 5 cameras. Under camera settings, set the aperture to a value between 13 to 16 for a 3D animation of art or antique completely sharp. Choose a value between 200 and 400 for ISO and 1/20 for shutter speed.
Then, adjust the light sources individually from 1 to 100% with the LightControl.
Tips: For the AutoMask to work perfectly, the lighting needs to be adjusted in order to create a contrast between the background and the products edges.
Note: For products with lighter colors such as white or transparent: the background should be darker than the product. For dark items such as the one used on this tutorial: background should be lighter than the product.
-
3. AutoMask settings

Under AutoMask setttings, click on new profile. Then, choose one of the 4 presets (matte, translucent, reflective or glass) according to your product typology.
PackshotCreator advantage: natural shadow
Orbitvu Station software gives you the advantage to keep a natural shadow on your art or antique photos when removing their background. If you want to apply it, select “apply shadow”.
-
4. Hemispherical animation settings
For the last set up step, under animation settings, choose 360 as the spin range. Then, select the number of images you want to use to create your 3D animation of art or antique on transparent background. The ideal number to get a good ratio between fluidity of the rotation and animation weight is 24 photos.
When done, click “snap”.
-
5. Adapting the transparent mask

Before creating the animation, you will be asked to adjust the opacity and quality of the transparent mask of your product’s photo. Move the cursors right and left until you get a perfect black shape of your artifact or antique object. Then, click next and save you profile for future uses. If you need to re-adjust the lighting, click on retake.
Note: The white portion is everything that will be removed from your hemispherical animation photos, and the back is what will be kept on the animation.
-
6. Developing the 3D hemispherical view

Now you are all set. The PackshotCreator software automatically synchronizes the 24 shots from the 5 different cameras with the turntable movement. Five rows are then created with 24 images per row on transparent background.
Press next to customize and save your animation.
-
7. Exporting settings

The exporting interface will automatically appears. Select the HTML format box, then choose a name for your file and the location you would like to save it. Next, click on the settings toggle. Now, choose the size and image quality of your animation. The ideal and recommended size for the web is 800px.
Next, click the settings toggle under HTML profile to customize your 3D animation of art or antique items on transparent background.
-
8. Customizing your animation

On the customization interface, you can modify spin type, direction and speed, as well add colorful buttons such as play/ pause, zoom and hyperlinks. When done, save this profile for future uses.
Important: if you would like to keep the transparent background on your 3D animation of art or antique, make sure you select PNG under image format.
-
9. Ready to be use

Now your 3D animation of art or antique item on transparent background is fully customized and ready to be exported. Click on the save button to save it.
The software automatically created file in HTML5 format. Send this file to a storage cloud where a link will be generated for you to be able to integrate it on your website. Your diamond animation will then be displayed online for all media readings without adding plugs-in !


