Automated photo studiosfor your in-house jewelry visuals
Capture every detail of your creations with Orbitvu photo studios

Jewelry, gemstone, and watch photography requires precision and care to capture every detail and brilliance of your creations.
At PackshotCreator, we understand the unique challenges posed by reflective surfaces and small precious objects. Orbitvu automated studios are specially designed to simplify this process, offering integrated 360° photography, still images, and video solutions.
With advanced technologies, such as software-controlled LED lighting and automated post-production options, Orbitvu photo studios ensure high quality, consistent and effective results, while reducing costs and production time.
Master jewelry photography in-house with customized solutions
Rings, necklaces, watch mechanisms or precious stones: with Orbitvu, getting professional visuals of your jewelry and timepieces becomes a simple and intuitive experience for everyone in your company.
- What solutions for creating in-house packshots of your jewelry, watches or small timepieces?
- Would I have the same professional result as a photographer?
- Is it possible to set up an Orbitvu photo studio at my workplace?
- Why use 360° photos and animations in an after-sales service process?
- How to control reflections, light dispersion, transparencies and details for macro photography?
- How do I automate my workflow and meet my production deadlines?
Your photographs and animations of jewelry, jewels, watches... internally
A winning space and logistics relationship
Thanks to its compactness and versatility, an Orbitvu photo studio easily finds its place in a jeweler's office, workshop or back room. No more going back and forth to service providers and insurance costs for items estimated at several thousand euros, such as precious stones, watches and exclusive orders.
Specific and customizable studios for watches and jewelry
Orbitvu offers a range of equipment dedicated to the creation of photos, macrophotographs and animations of items as complex as diamonds, emeralds, watch mechanisms, alloys and pure metals. These solutions are designed to meet the high demands of these specific sectors.
A versatile use of your visuals: internal and customer
Orbitvu studios make it possible to produce high-quality photos and animations for a variety of uses: e-commerce, catalogs, brochures, purchasing services, research and development, and even quality control. This versatility ensures that your visuals meet all of your internal and external needs, thus strengthening the effectiveness and consistency of your visual communication.
Transform your photography process today! Discover how our solutions can improve the presentation of your jewelry and watches.

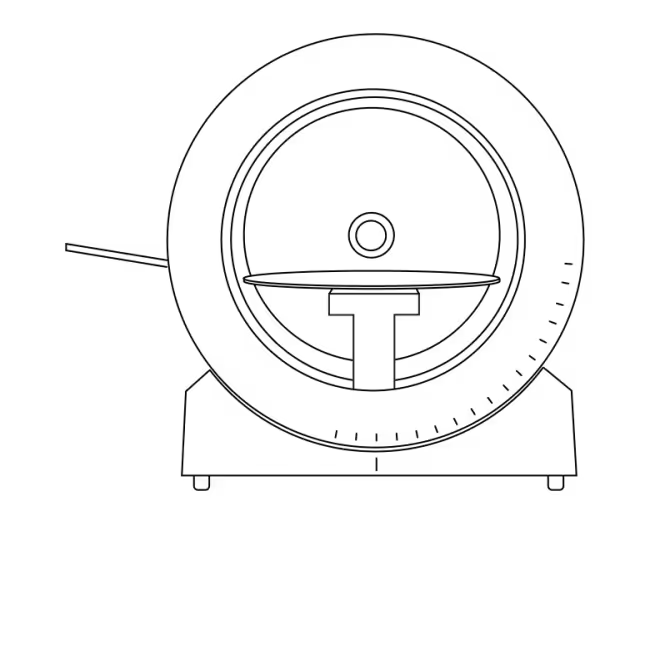
Alphashot Micro v2
This photo studio dedicated to jewelry allows you to take the best photos and animations of all your products.

Alphashot 360
Small 360° photo studio that can accommodate products up to 30 x 30 x 30 cm.

Alphashot Pro G2
The AI photo studio that unleashes your creativity while optimizing your productivity, for exceptional images in complete autonomy.
Photo studios for all types of visuals
Orbitvu photo studios, driven by the advanced Orbitvu Station software suite, are designed to create interactive animations, such as those of a pocket watch, to guide your customers in an immersive way during their visit to your e-commerce.
Thanks to its capacity and its dual front and top shooting system, the Alphashot Micro v2 is ideal for flat photography of ornaments, costume jewelry boxes, and ranges of accessories. Equipped with a suspension kit, it also makes it easy to capture long necklaces, waist chains, and any long item, offering maximum flexibility for all your jewelry photography needs.
Capture every detail of your creations with the Orbitvu jewelry solution
The Alphashot Micro v2 offers optimal lighting conditions for jewelry and watch photography, thanks to its full LED lighting and adjustable backlighting.
Designed specifically for these sectors, it distributes light evenly around objects, guaranteeing photos and 360° animations of exceptional precision. Whether it's to capture the brilliance of a diamond, the texture of a leather strap, or the details of a precious stone, this tool is indispensable.
In addition, the Alphashot Micro v2 allows you to compose animations to the nearest degree and create visuals in a practically enclosed light environment. Ideal for quality control or packshot photography of jewelry for e-commerce, it allows you to reveal the patina of a locket or to faithfully reproduce the colors of emeralds.
Thanks to the Superfocus feature, you can simultaneously show the work on a bracelet and an internal engraving, while meeting the 4C standards for diamonds. The Orbitvu photo studio shooting environment, combined with advanced software features, gives you the possibility to show every detail of a product or to enhance it. Dynamic zoom allows visitors to examine every component of a watch, from the mechanism to the finishes, in every detail.
Main features
Superfocus
Use Superfocus to show the unique characteristics of your jewelry as accurately as possible. Get a completely clear visual, eliminating any areas of blur.
Magnifying glass
The magnifying glass tool allows the customer to see the unique details of your jewelry. For example, a polished surface of a ring, a patina on a gear, the cullet of a precious stone...
LightControl
Illuminate your precious stones and jewelry in the best possible way thanks to multi-zone and multi-intensity lighting.
360° animations
Create incredible 360° animations of your products in just one click. Choose the number of photos you want and let the software work.
Why talk to our experts?
- 20+ years of experience: Unparalleled expertise in photo automation
- 10,000+ installations: Proven solutions around the world
- Continuous innovation: The latest advances in automated photography
- Personalized advice: Recommendations adapted to your specific challenges
- Accelerate your visual production
- Optimize your photo workflow
- Maximize your return on investment
Fill out the form now to benefit from our unique expertise. Our team will contact you within 24 working hours.


