How do I create an automatic multi-angle shot of an object?
How to create a multi-angle and automated shot of an object? 🤖

Studio Alphashot Pro G2
Orbitvu Station software and an art object
3 minutes
The presentation Multi angles of your products on your website is essential and the production of these visuals can be facilitated thanks to automation. 🤖
In this tutorial, we'll guide you step-by-step to capture photos from different angles using the Alphashot PRO G2
Here we are using an art object as an example, but this method also applies to technical products, handcrafted or collectible.
Thanks to the interface ofOrbitvu Station and multi-view templates, you will gain in precision, consistency and rapidity. ⏳
Also discover how to make a 360 video of your statue for immersive content.
Positioning the object
The first step is to place the object in the center of the turntable. The Alphashot PRO G2 is equipped with a centering laser, which allows you to position the object with precision. 📍
For fragile objects or objects that could move during the rotation of the tray, you can use fixing paste or double-sided invisible tape to stabilize without altering the aesthetics.
Make sure the camera is properly positioned at the desired angle.

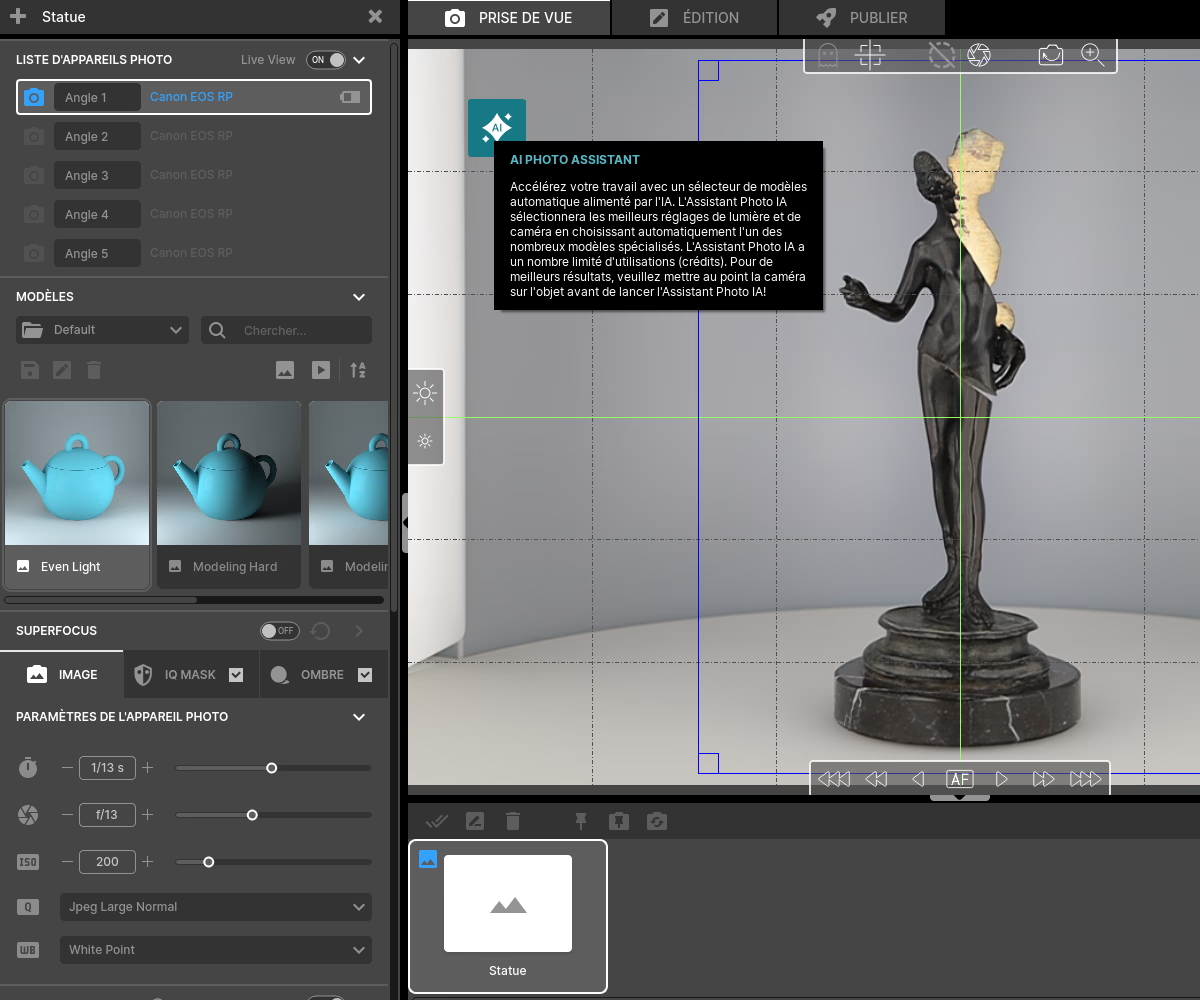
Set up the light with the help of AI
This studio has a AI Assistant, a technology that automatically recognizes the characteristics of the object placed in the studio. 💡
Click on theThe “AI” icon and it offers several adapted light configurations. You can choose one and fine-tune the settings manually. 📂

Activate IQ Mask for automatic clipping
Activate the function IQ Mask, it allows you to automatically crop the object on a white or transparent background. To get the perfect clipping, adjust the light level. Your object should be darker than the background. Anything that is still clear will be removed.
✨ Tip : Play on the panels at the back and on the turntable to create a light in the opposite direction of your object which will make it appear darker.

Program the shooting angles
With the Orbitvu Station software, you can program shooting multiple shots at predefined angles.
For example, you may decide to capture the object at 0°, 45°, 45°, 90°, 135°, and 180°... To do this, choose your angles by clicking outside in the wheel to fix shooting points as in the photo.
Once the angles are set, the turntable automatically adjusts to each position, triggers the shot, and then moves on to the next without manual intervention. 🤖
You can also save this configuration as a reusable template, which is ideal for creating a coherent set of visuals at scale. 📂
Capture and process your images
When everything is ready, simply click on “Capture everything” in Orbitvu Station. 📷
The studio is going to run the entire sequence. Once the images have been captured, you can consult them, sort them, and edit them if necessary via built-in post-processing options. 🎨

Export your visuals and share them
Finally, you can export your images from the tab “Publish” and choose the export format JPEG for the web, PNG with transparency, WEPB, TIF... 📤
You can also publish your photos from the software directly on your social networks or on a marketplace like Shopify or Magento. 💻

FAQS
Why talk to our experts?
- 20+ years of experience: Unparalleled expertise in photo automation
- 10,000+ installations: Proven solutions around the world
- Continuous innovation: The latest advances in automated photography
- Personalized advice: Recommendations adapted to your specific challenges
- Accelerate your visual production
- Optimize your photo workflow
- Maximize your return on investment
Fill out the form now to benefit from our unique expertise. Our team will contact you within 24 working hours.
