How to make a ring stand up for photography? The traditional technique VS PackshotCreator technology
How to make a ring stand up for photography?
Ring photography is, by definition, one of the most complicated of the jewelry industry. In order to take a picture of the entire item, it is necessary to make it stand up, not laid down. The ancestral technique of photographers consists in tinkering, gluing the ring and then editing at length each visual created. Here, you can’t rely on good camera settings alone.
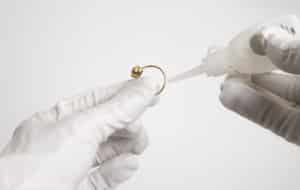
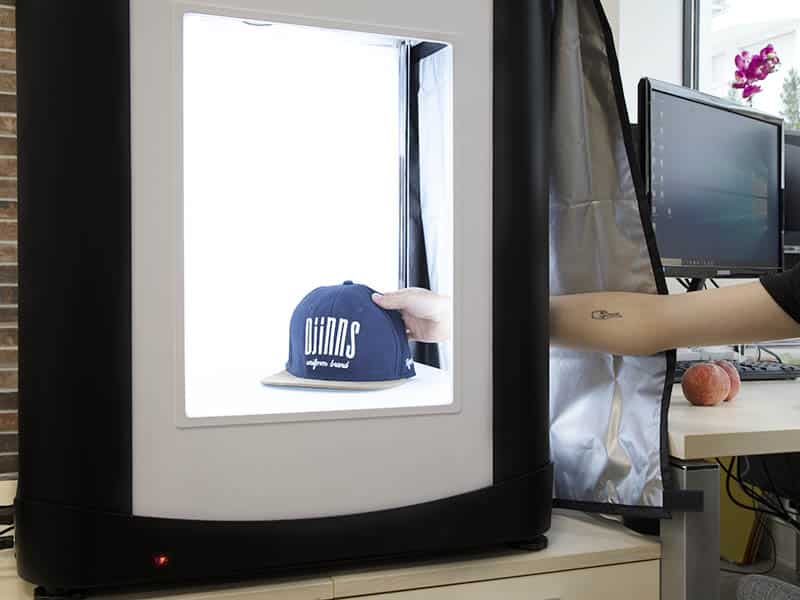
PackshotCreator propose today an innovative and unique technology to hold still and photograph rings by skipping all those steps: a photo studio controlled by a software, combined to a vacuum system connected to the center of the studio’s turntable.
Eric Valdenaire, jewelry and artwork photography specialist, tested for us the two shooting techniques. He gives us a comparison using the new PackshotMacro Ring Edition photo studio as a preview.
“The time-saving is clear”
8 seconds VS 18 minutes
To realize still pictures, the goal is to highlight some details of the jewel and enlighten all its facets. It is necessary to place the rings vertically, thanks to a stand, Blue-Tack or glue. However, the use of these temporary stands requires a lot of handling: meticulousness during the preparation and installation of the jewel, cleaning after the shooting, use of an editing product photography software.
“In total, it takes minimum 3 minutes to set up and take a picture of the ring. Add at least 10 minutes of editing for an experienced Photoshop user, and 5 minutes of careful cleaning of the ring in order not to damage it. With the PackshotMacro RE, the placement of the ring and the shooting takes only 8 seconds. There is no need to edit the visuals to remove the stand since the vacuum system holds the ring invisibly.”
The expert photographer Eric Valdenaire notes a real added value in terms of time and productivity compared to existing traditional solutions. It should also be noted that the risk of damaging the ring is nil and therefore offers the photographer the assurance and freedom to photograph all his rings without any problem!

“Complexe shootings become a piece of cake”
Hyper quick Hyperfocus
To get a visual with an exceptional quality, ring photography needs systematically the use of a macro lens, dedicated to shoot very small objects. We oftenly combine it to the focus stacking technique. It consists to assemble multiple pictures in only one to get a perfect sharpness. The traditional technique to hold rings can face some issues. Homemade stands can often damage the products. We have to be quick between the placement of the ring and the shooting and we apply the minimum amount of glue so the cleaning can be simple and immediate. Unfortunately, we also risk that the ring falls down slowly during the focus stacking, and the shooting is a failure.
With the 360 jewelry photography studio PackshotMacro RE, the ring can be hold still as long as we want! Entirely automated via the PackshotCreator software, the focus stacking is easily realized with the Hyperfocus feature. Moreover, thanks to the powerful vacuum system, the ring does not shake during the shooting. The focus stacking can be realized on the first try.
Photographer Eric Valdenaire unveils: “During a traditional shooting, we have to manually assemble the picture with an editing software, plus the removal of the stand. It takes a lot of time. Here, the stacked visual is ready-to-use and don’t need any or a few edits”.

Rotation at lightning speed
The upper level of the ring presentation is of course through 360 animations. Giving the opportunity to rotate on itself in order to observe its details, the ring, the set stones, the assembly, is the assurance of offering a complete view of the product.
With a traditional technique, the configuration is not unrealizable, but very difficult to set up: holding the ring, rotating a handmade turntable at precise degrees, triggering the camera, and of course, editing and assembling the animation.
In the automated configuration of the PackshotMacro RE, everything becomes possible! “Simply place the ring, set the desired rotation speed and number of images in the software and then click on SNAP. When the ring is properly placed, the holding is qualitative enough to shoot 360° animations, without vibration and with a stable holding over time. The PackshotCreator technology ensures the creation of homogeneous and relevant visuals.” says the test photographer.
“PackshotCreator RE is a jewel of hardware and software technology”
In addition to the qualities mentioned previously for its vacuum system, the expert Éric Valdenaire has noticed that the PackshotMacro RE also demonstrates a unique and qualitative lighting for ring photography. Equipped with Dual Lighting technology, the studio offers lighting with two colour temperatures to illuminate rings in gold, silver or set with stones. The software controls the lighting system over 10 sources, which are adjustable from 1 to 100%.
According to him, the studio is custom-designed for ring visuals and is characterized “by its ease of use and a software interface that helps with repeatability and reproducibility of placement. These are not negligible elements, especially when the volume of products to be photographed is significant”.

A proven design
“The solution offers an impeccable construction, simple to assemble and connect,” says Éric Valdenaire.
Indeed, the management of the warm-up and the low noise level: “it is quite acceptable for continuous use during a whole day of shooting in the studio, without any risk of discomfort”. According to the photographer, an advantage linked to the quality design of the system: “this solution is built and impeccably finished. The care of the experts can be seen in the components used, their finishes, but also in the accessories or the motor, which is well ventilated, insulated with foam and mounted on silentblock. »
Traditional technique VS PackshotCreator technology: the results of the comparator
| Benefits | Trinked stands | Vacuum system |
| Ring tilt control | Yes | Yes |
| Gluing / fixing | Yes | No |
| Mouting | Yes | No |
| Cleaning of the item after the shooting | Yes | No |
| Limited editing | No | Yes |
| Risk of damaging the item (glue, fixing) | Yes | No |
| Time saving of several minutes per ring | No | Yes |
- Discover the accessories for 360° jewellery photography
Become the photographer of your products
Other posts you might be interested in :

An automated photo studio to create animations of small art pieces
Animating 200 pieces of about ten different materials, assembled on a disc no larger than a watch dial: this is the challenge that photographer Eric Valdenaire took up for his client. The use of one of the latest PackshotCreator automated photo studios was a decisive factor in the success of these shots. They were then […]

15 years of partnership and more than a hundred million visuals created
How to simplify the production of more than a hundred million still product photos and 360° product animation or 3D animations of products every year? PackshotCreator and Ortery are two pioneers in product photography. They are celebrating 15 years of technological partnership, dedicated to finding an even more effective response to the question that thrives […]
4 fundamentals for reducing abandoned shopping carts
Let’s take a look in this article at how to animate an e-commerce site in order to drastically reduce abandoned shopping carts. The ultimate objective is to optimize the conversion rate For this, we will examine four of “sure things” of customer experience, after having defined the two key terms of this article. The conversion rate designates […]